Placements
The Placements Management page is where you can view, organize, and take action on all your video ad placements. Whether you're creating a new placement or reviewing performance data, this page gives you the tools to do it quickly and efficiently - all in one place.
What You’ll See on the Page
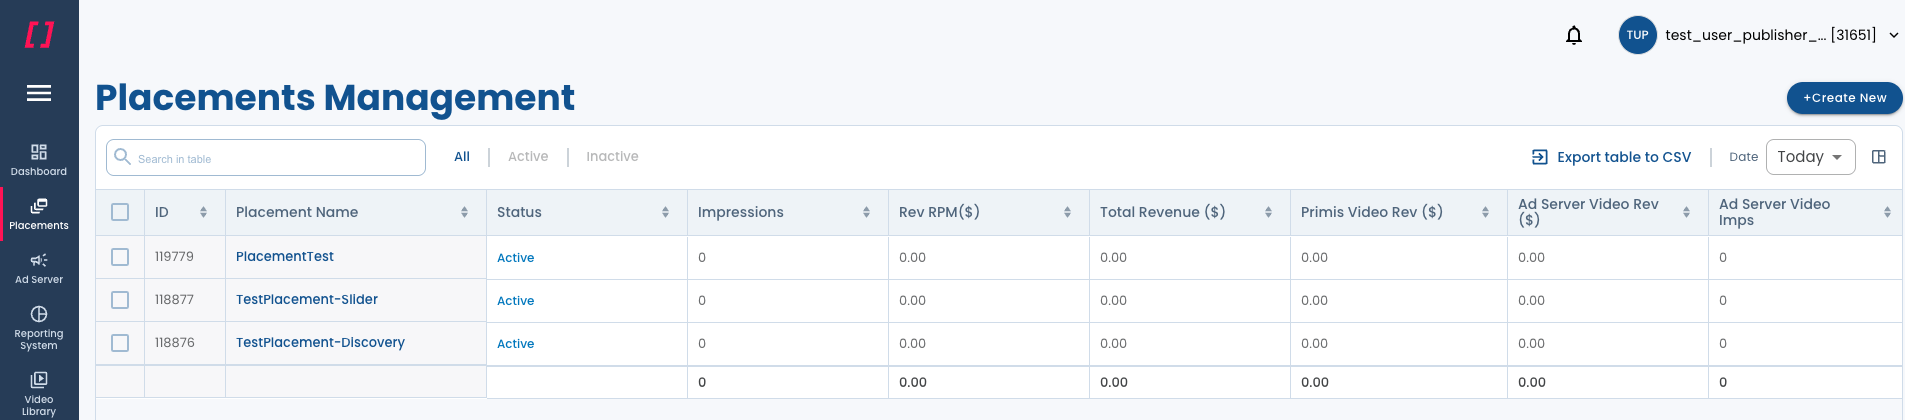
The Placements Management screen is designed with a table-based view, making it easy to monitor placement details and take bulk actions.
Here's what you’ll find:
| Section | Description |
|---|---|
| Placements Table | Displays all of your placements in a sortable, customizable table. Each row represents a placement with key performance and configuration data. |
| Filters | Filter placements by status: All, Active, or Inactive. |
| Search & Date | Search for specific placements and filter by date range (e.g. Today, Yesterday, Last 7 Days). |
| Actions Toolbar | Appears only after you select one or more placements, giving you bulk options such as Duplicate, Delete, Pause, Activate, Edit, and Export. |
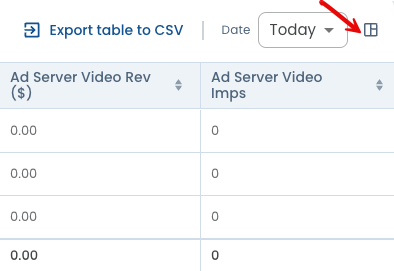
| Export Options | part of the actions toolbar menu, offering 2 options:
|
| Pagination Controls | Navigate between pages and choose how many placements to view per page. |
Viewing Placements in the Table
Each placement is displayed in a row with performance stats and settings, the table includes all columns by default and you can customize your view by clicking the column settings icon and choosing which columns to show or hide.
Taking Actions on Placements
When you select one or more placements using the checkboxes, the action bar will appear.
You can:
Duplicate – Quickly clone a placement with all its settings.
Delete – Remove the selected placement(s) permanently.
Pause / Activate – Change the active status of your placements.
Edit – Modify selected placements. To edit a single placement, directly click on its name to open the edit placement form.
Bulk Edit – Select 2 or more placements, the edit button will become active.
Export Tags – Generate the relevant placement tags.
Export to CSV – Download the current table data as a CSV file.

Exporting Your Data
You can export placement data in two ways:
Export Tags — Select placements and click "Export Tags" to get the ad tag code and implement it on your site.
Export to CSV — Click the "Export to CSV" icon to download placement data as a spreadsheet.
Another way to access your data is through our Reports section, which provides full placement data — either manually or automatically, depending on your setup.
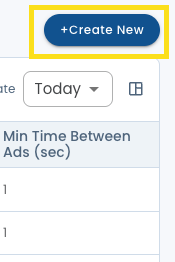
Creating a new placement
To add a new placement:
- Click the "+ Create New" button in the top-right corner.
- Follow the steps in the setup flow to configure your new placement.
Customizing Your View
You can adjust the table layout to fit your needs:
Edit Columns – Use the column icon to show or hide specific metrics in the table.
Resize Columns – Hover over a column edge and drag left or right to change the width.
Sort Columns – Click any column header to sort values in ascending or descending order.
Pagination – Choose how many rows to display per page (10, 25, 50).
Sort Data: Click on any column header to sort ascending/descending.
Tips & Best Practices
- Use filters to narrow your focus (e.g. Active placements only).
- Select multiple rows to apply bulk actions.
- Export data regularly to track changes over time.
- Customize the columns to focus on the metrics that matter to you.
Updated 9 months ago
What’s Next
Create a Placement](doc:create-a-placement)